Verifying your account is the first step you’ll encounter on the OnlyFans platform when you want to start posting content as a content creator. If you’re looking to monetize your content, this verification process is necessary. However, it’s important to note that if you only wish to subscribe and view content created by others, you won’t need to go through the verification process.
Why is it essential to verify your OnlyFans account?
There are several reasons why verifying your OnlyFans account is crucial. First and foremost, it helps ensure that minors are not using the platform in any way. Verification also serves to prevent activities such as uploading stolen content or using someone else’s identity. Overall, it helps create a safer community and environment, making it more inviting for content creators to join and for subscribers to enjoy the content.
Is OnlyFans verification safe?
Yes, the OnlyFans verification process is secure. It’s entirely normal to feel a bit hesitant because this process involves scanning documents like your ID, card, and email. However, rest assured that the entire process is handled by a specialized company, Ondato, which verifies users online and handles data securely. Furthermore, your data remains hidden from anyone, including your subscribers. Only your display name will be visible, allowing you to maintain complete anonymity if you wish.
How to Verify Your OnlyFans Account: Step by Step
While it might seem intimidating, you’ll find that the entire process can take less than a day. Here’s a 4-step guide to help you start posting in no time.
Step 1: Sign-Up
Go to OnlyFans.com and click the Sign-Up button. During this stage, you’ll only need to enter your email address and password. Once you’ve done that, confirm that you’re not a bot by solving a captcha and log in to your account. After that, on your homepage, you’ll notice that you need to verify your email. Click on it to send the verification email from OnlyFans to your email address. Once you’ve done that, you’ll need to go to your inbox and follow the link, which will take you back to OnlyFans, completing the email verification.

Step 2: Set up your Account Information.
After successfully verifying your email on OnlyFans, the next crucial step is to complete your profile. Go to the “More” section in the sidebar and click on “Become a creator (to earn)” to access your basic profile. Here, you can add your profile picture, header image, and write your bio. This step is essential for setting up your creator profile. You can refine and improve these details later as you gain more experience on the platform.
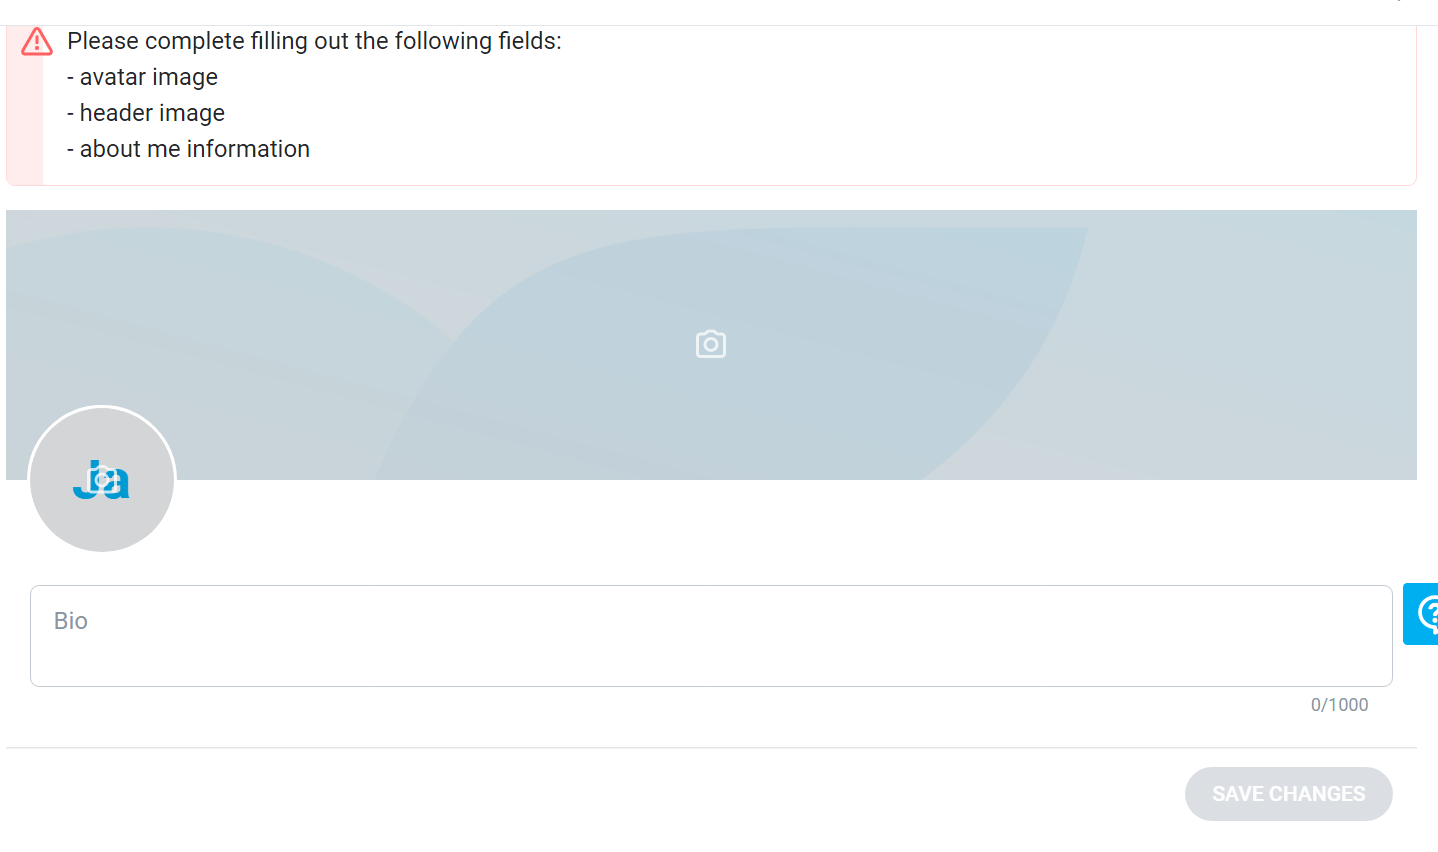
When it comes to your avatar and header images, it’s essential that they showcase your best content. However, it’s crucial to avoid displaying any explicit nudity in these images. The idea here is to create content that’s exciting and engaging without revealing too much. The header image, in particular, should be in landscape format. Images captured in native portrait mode might not fit well, so consider taking a new image specifically for your profile’s header.
Moving on to your bio, it’s equally crucial as it plays a significant role in turning visitors into paying subscribers. We strongly recommend crafting a well-written bio to attract more subscribers. You can check out our comprehensive guide on creating an effective OnlyFans bio for more in-depth insights. In essence, your bio should clearly and succinctly state what you offer on your OnlyFans page. To capture the attention of potential subscribers, use a language that’s both fun and engaging.
After completing your profile information, the next step is to select your country of residence and confirm that you are over 18 years old. During this process, it’s crucial to ensure that you provide accurate information as any inaccuracies or false data can result in delays in the verification process and potential rejection of your OnlyFans verification. Additionally, keep in mind that your choice of home country during this step is unchangeable.
After completing this step, we move on to the actual verification process.
Step 3: ID Verification
OnlyFans requires creators to submit a clear photo of a government-issued ID to confirm their identity. Many individuals hesitate at this stage due to concerns about sharing personal documents online, especially if they wish to remain anonymous as faceless creators. However, it’s essential to note that your data remains confidential and is not visible to anyone but you. Companies handling this process maintain the security and exclusive use of your data solely for OnlyFans’ identity verification.

During this stage, you will be required to upload a few documents to proceed with your identity verification. Acceptable forms of identification include passports, state-issued ID cards, and driver’s licenses. You’ll be asked to choose the type of document you want to use for verification. Make sure to take clear photos of both the front and back of your government-issued document, ensuring that all details are visible and the text is legible. Be sure not to edit, crop, or hide any information in the photos, and avoid common errors like blurry, small, or overly dark images, as these could lead to a verification denial. Remember, your photos should be in color, not electronic documents or photos of photos; and all corners of the document should be visible. There should be no redactions, coverings, or censoring of any information. Ensure that your photos are in .jpg or .png format and are smaller than 7MB.
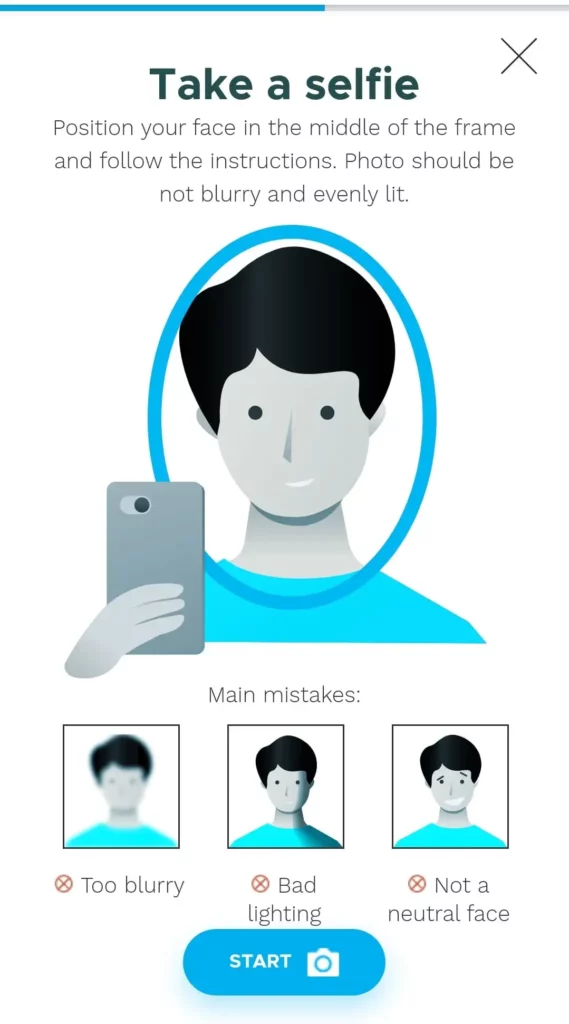
After capturing images of both sides of your document, you will proceed to take a real-time selfie to confirm your identity. To continue with the verification process, you will need a mobile device with camera access. Position your face as instructed within the frame, and the app will provide guidance. If you are using a computer, you have the option to receive a verification link through SMS or by scanning a QR code.
Step 4: Linking your Bank Account
After 24 to 72 hours, you’ll receive verification confirmation, and the next step is to set up your earnings by linking your bank account. To link your bank account, click on “More” in the left menu, which will provide you with access to your banking page. Here, you’ll need to fill in the required information. This includes your full legal name, full address, city, ZIP code, and date of birth. It’s crucial that you provide accurate and up-to-date information for each of these fields, as it will be essential for the success of your financial transactions. Ensuring the accuracy of this data is a key step in managing your earnings effectively on the platform.
Great! Everything is in order. You’ve successfully become a verified OnlyFans content creator. If you faced any challenges during the verification process, feel free to refer to our “Why Was My Verification Rejected?” article for additional assistance.